

How To Put Text In Photoshop Cs6
In this tutorial, we learn how to place an image in text, one of Photoshop'due south most pop and classic effects. As we'll see, thanks to the power of clipping masks, placing an image inside text with Photoshop is simple and easy. I'll exist using Photoshop CS6 hither but this tutorial is besides fully compatible with Photoshop CC (Creative Cloud). If you're using an older version of Photoshop, be certain to check out my original Placing An Paradigm In Text tutorial.
Here the image I'll be using (Hawaiian beach photo from Shutterstock):
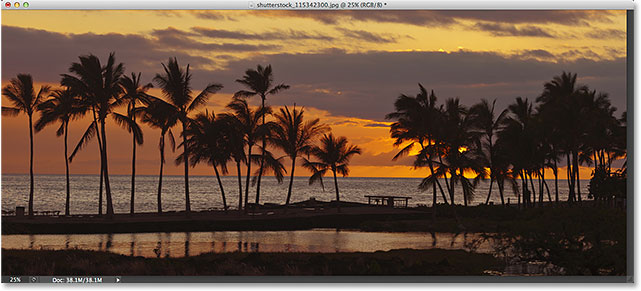
The original image.
And here's what the same paradigm will look like when placed inside text:
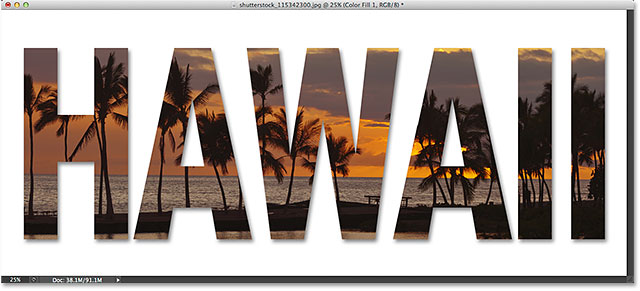
The final result.
Let's get started!
How To Place An Image In Text With Photoshop
Step one: Duplicate The Groundwork Layer
Open the prototype you want to place inside your text. With the prototype newly opened, if yous look in your Layers panel, you lot'll see the image sitting on the Groundwork layer, currently the only layer in the document:
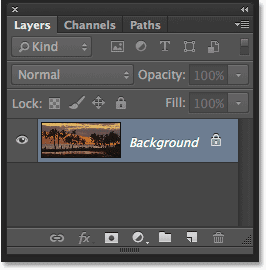
The Layers console showing the epitome on the Background layer.
We need to make a copy of this layer. Get up to the Layer menu in the Menu Bar forth the top of the screen, choose New, then choose Layer via Copy. Or, you can select this same command from the keyboard by pressing Ctrl+J (Win) / Command+J (Mac):
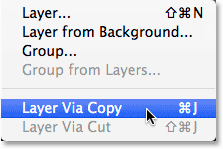
Going to Layer > New > Layer via Copy.
Photoshop creates a copy of the layer, names it "Layer i", and places it directly above the Groundwork layer:
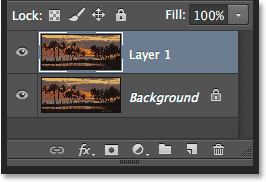
A re-create of the layer appears above the original.
Pace 2: Add A White Solid Color Make full Layer
Next, let'south add 1 of Photoshop's Solid Colour Fill layers to use equally the background for our effect. Click on the New Fill up or Adjustment Layer icon at the bottom of the Layers panel:
Clicking the New Make full or Adjustment Layer icon.
Cull Solid Colour from the height of the list that appears:
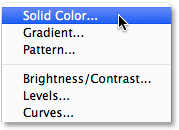
Selecting a Solid Color Fill layer.
Photoshop will pop open the Color Picker and so we can choose the color nosotros want to fill the layer with. I'1000 going to use white for my background color by entering a value of 255 into the R, G and B boxes:
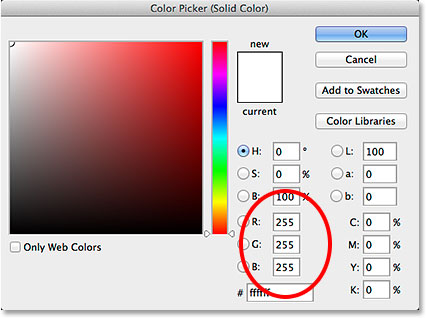
A value of 255 for the R, 1000 and B values gives u.s. white.
Click OK to shut out of the Color Picker. Dorsum in the Layers panel, we encounter the white Solid Color Fill layer (named "Colour Fill up 1") sitting above the two epitome layers:
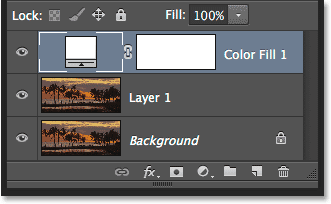
The Layers panel showing the Solid Color Fill layer.
And considering the Make full layer is sitting above both of our prototype layers, the certificate is now temporarily filled with white:
The image is temporarily hidden by the Make full Layer.
Step three: Drag The Solid Color Fill Layer Below Layer 1
Nosotros need to move the Solid Color Fill layer below Layer i. Click on the Solid Color Fill layer (make certain you click on its piffling color swatch icon on the left, not the layer mask icon on the right), and with your mouse button yet held downwardly, elevate the layer down until you see a highlight bar appear between the Background layer and Layer 1:
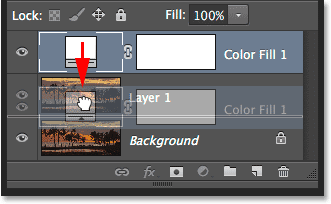
Dragging the Fill layer betwixt the Background layer and Layer one.
Release your mouse button when the highlight bar appears to drop the Fill layer into place between the two image layers. Your image will reappear in the certificate window:
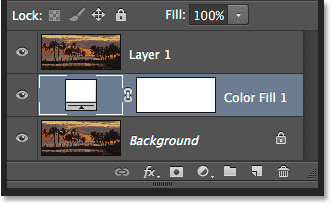
The Fill layer at present sits between the two image layers.
Step 4: Select Layer one
Click on top layer (Layer one) in the Layers panel to select it:
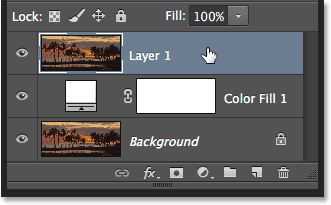
Selecting Layer i.
Footstep 5: Select The Type Tool
We're set up to add our text. Select Photoshop'southward Type Tool from the Tools panel along the left of the screen. You can also select the Type Tool simply by pressing the letter T on your keyboard:
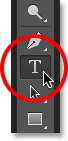
Selecting the Blazon Tool.
Stride 6: Choose Your Font
With the Type Tool selected, go up to the Options Bar along the tiptop of the screen and choose your font. Since our goal is to place an image within the text, generally fonts with thick letters piece of work best. I'grand going to choose Arial Black, simply of course you can choose whatever font you similar. Don't worry about the font size for at present. Nosotros'll resize the type manually later:

Selecting a font from the Options Bar.
Step seven: Prepare Your Type Color To White
This side by side step isn't admittedly necessary, but to assistance us see the text as we're adding it, let's prepare our type colour to white. If your type colour is already gear up to white (or another color y'all tin can easily see in front of your image), you can skip this pace. To alter the type color, click on the color swatch in the Options Bar:
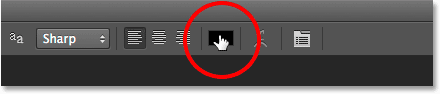
Clicking on the color swatch.
This once more opens the Color Picker. I'll choose white simply every bit I did before by entering a value of 255 for the R, 1000 and B options. Click OK when yous're done to close out of the Color Picker:
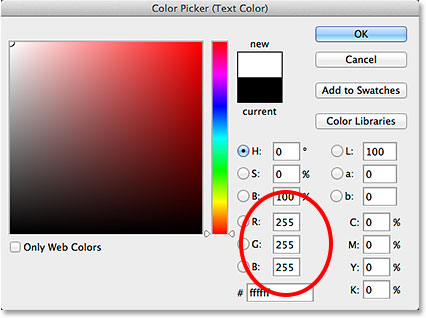
Setting the R, G and B values to 255.
Step 8: Add Your Text
With your Type Tool selected, your font chosen and your type color fix to white, click within your document and add your text. I'll type the word "HAWAII":
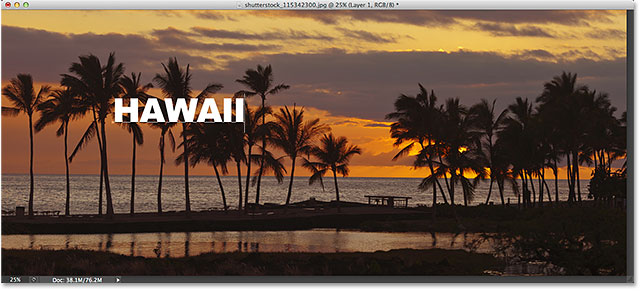
Adding my text.
Click the checkmark in the Options Bar when you're done to accept your text and exit out of text editing manner:
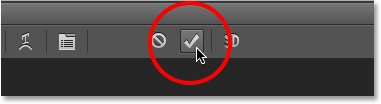
Clicking the checkmark.
Acquire all about working with type in Photoshop with our Photoshop Blazon Essentials tutorial!
Pace 9: Elevate The Type Layer Beneath Layer 1
If we wait in the Layers panel, we see our newly added Type layer sitting above Layer ane, which is why the text is appearing in forepart of the prototype in the document:
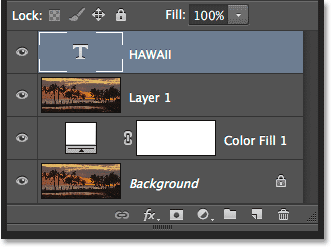
The Blazon layer currently sits to a higher place the image.
We need to motility it below Layer i. Click on the Blazon layer and, with your mouse button still held down, elevate information technology downward until yous see a highlight bar appear between Layer i and the Solid Color Fill layer:
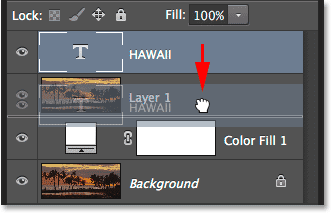
Dragging the Blazon layer beneath Layer one.
Release your mouse push button when the highlight bar appears to drib the Type layer into place:
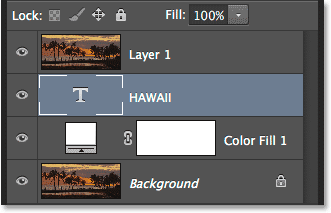
The Blazon layer now sits below Layer i.
Footstep 10: Select Layer ane Again
Click once again on Layer 1 to select information technology and brand it active:
Clicking on Layer 1 to select it.
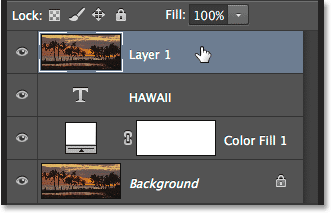
Footstep eleven: Create A Clipping Mask
With Layer one selected, click on the pocket-size menu icon in the top right corner of the Layers panel:
Clicking the Layers panel menu icon.
Cull Create Clipping Mask from the card that appears:
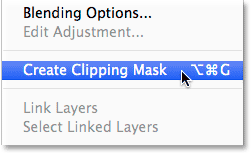
Choosing the Create Clipping Mask command.
This clips the image on Layer 1 to the text on the Type layer beneath it, meaning that only the area of the prototype that sits directly above the actual text on the Type layer remains visible, creating the illusion that the image is inside the text. The rest of the epitome is now hidden from view, and in its place, nosotros meet the solid white Fill up layer:
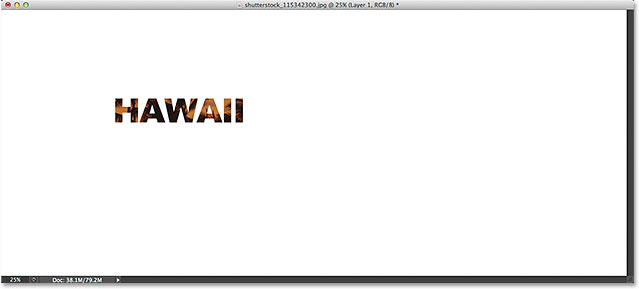
Only the area of the prototype that sits directly above the text remains visible.
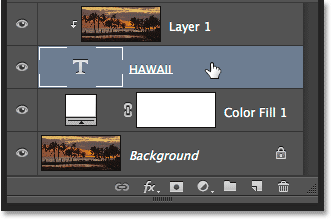
If we wait again in the Layers console, we encounter that Layer one has been indented to the right, with a pocket-size pointer pointing downwards at the Type layer below it. This is how Photoshop lets us know that the Type layer is beingness used as a clipping mask for Layer one:
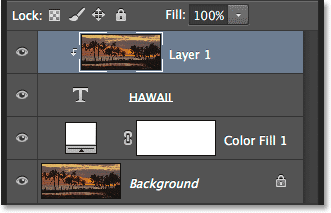
The Layers panel showing Layer 1 clipped to the Blazon layer.
Related tutorial: How Photoshop Clipping Masks Work
Step 12: Select The Type Layer
Click on the Blazon layer to select it and go far active:
Selecting the Type layer.
Step 13: Resize And Reposition The Text
All that'southward left to practise now is to motion and resize the type, and we can do both of those things using Photoshop's Gratis Transform command. With the Type layer selected, go up to the Edit bill of fare at the superlative of the screen and cull Free Transform. Or, press Ctrl+T (Win) / Command+T (Mac) on your keyboard to select Free Transform with the shortcut:

Going to Edit > Complimentary Transform
This places the Gratuitous Transform box and handles (the piffling squares) around the text. To resize it, simply click and drag any of the handles. If you want to resize the type without distorting the original shapes of the letters, concur downwardly your Shift primal every bit you lot elevate any of the 4 corner handles. You can likewise resize the text from its center past holding down the Alt (Win) / Option (Mac) key as you drag. Finally, to movement the text, click inside the Complimentary Transform box and elevate it into position with your mouse:
Moving and resizing the text with Free Transform.
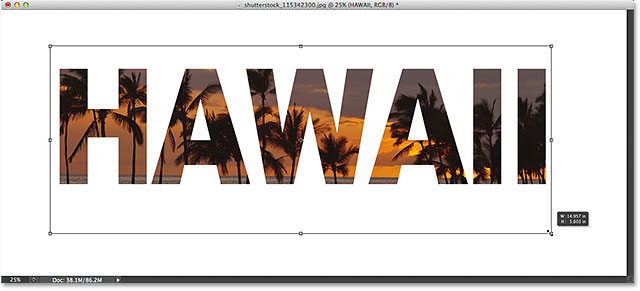
When you lot're done, press Enter (Win) / Return (Mac) to accept the transformation and exit out of Costless Transform:

The event after moving and resizing the type.
Step 14: Add A Drib Shadow (Optional)
This final step is optional, just to consummate the issue, I'll add a drop shadow. If y'all want to follow forth, with the Blazon layer even so active, click on the Layer Styles icon (the "fx" icon) at the bottom of the Layers panel:
Clicking the Layer Styles icon.
Choose Drop Shadow from the bottom of the list that appears:
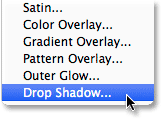
Selecting a Drop Shadow layer effect.
This opens the Layer Style dialog box set to the Driblet Shadow options in the middle column. I'll lower the Opacity of the drop shadow from its default value of 75% down to fifty% to reduce its intensity, and then I'll fix the Angle of the shadow to 120°. I'll increase my Distance value to 30px and the Size to 40px, but these two values depend a lot on the size of your image so you may need to play around with them on your ain to notice the settings that work all-time:
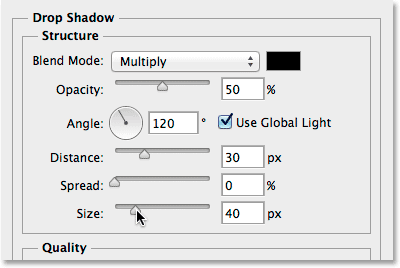
The Driblet Shadow options.
Click OK to close out of the Layer Mode dialog box, and we're done! Here, later on calculation a drib shadow to the letters, is my final "prototype in text" result:
The final result.
And there we have it! In this tutorial, we learned how to identify an image in a single word, or a unmarried Type layer. In the next tutorial, acquire the trick to placing an image in multiple text layers at once! Or visit our Text Furnishings or Photo Effects sections for more Photoshop effects tutorials!

How To Put Text In Photoshop Cs6,
Source: https://www.photoshopessentials.com/photoshop-text/text-effects/image-in-text-photoshop-cs6/
Posted by: franksititan68.blogspot.com
0 Response to "How To Put Text In Photoshop Cs6"
Post a Comment